viernes, 30 de diciembre de 2011

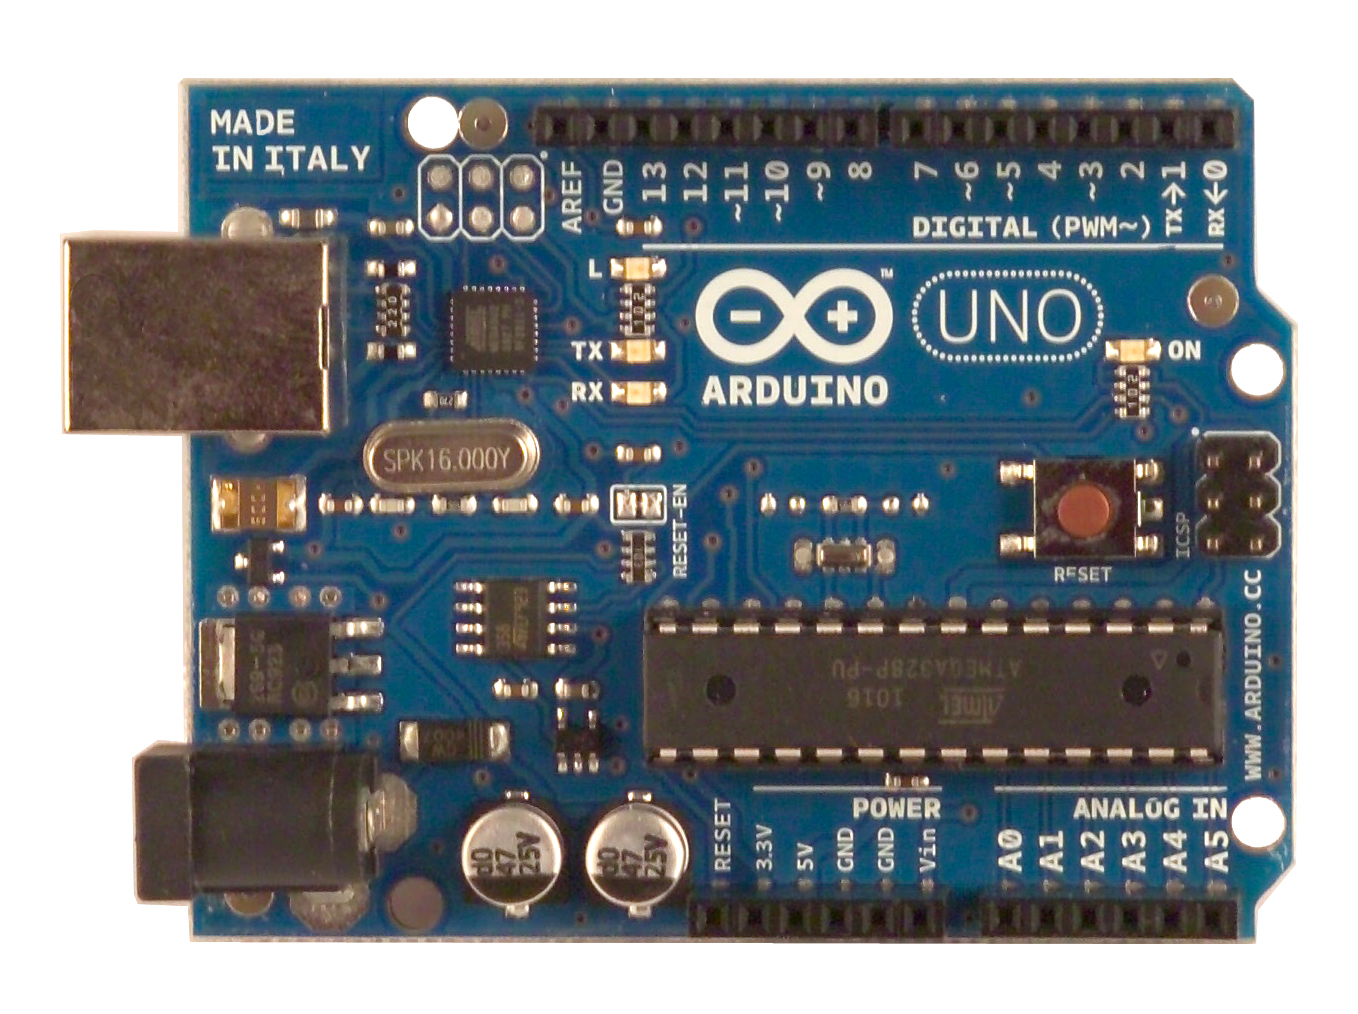
Detector de mentiras conArduinoNunchuk y servo

Este proyecto sirve para probar el manejo del Nunchuk de la Wii. Según se gire en el aire el Nunchukse le envía al servo la orden de giro.

La chorradita del cartel de Mentira y Verdad ha sido para divertir a mi hija pequeña y a una amiga suya.

Estuve sopesando algunas librerías para manejar el Nunchuk y al final me he decantado por http://www.gabrielbianconi.com/projects/arduinonunchuk/

Como adaptador para conectar el nunchuk a Arduino he usado el WiiChuck http://todbot.com/blog/2008/02/18/wiichuck-wii-nunchuck-adapter-available/


Código fuente:

/*
 * Detector de mentiras conArduinoNunchuk y servo
 *
 * Copyleft 2011 Antonio Garcia Figueras
 *
 * Usando libreria de Gabriel Bianconi, http://www.gabrielbianconi.com/
 *
 * Project URL: http://www.gabrielbianconi.com/projects/arduinonunchuk/
 *
 */

#include <Wire.h>
#include "ArduinoNunchuk.h"
#include <Servo.h>

#define BAUDRATE 19200

ArduinoNunchuk nunchuk = ArduinoNunchuk();

Servo myservo;

 int minX;
 int maxX;
 int minY;
 int maxY;
 int minZ;
 int maxZ;
 int contador;
 float razonX;
 int posXServo;

void setup() {
  Serial.begin(BAUDRATE);
  myservo.attach(9);  // attaches the servo on pin 9 to the servo object
  myservo.write(90);  // lo colocamos centrado
  Serial.println("Inicio incializacion");
  nunchuk.init();
  Serial.println("Final incializacion");
  calibraAccel();
 
//Calculo de la razon para calcular el valor del servo (0-180)
//en funcion del movimiento del nunchucku
  razonX = (float)180/(maxX - minX);
  Serial.print("Razon:");
  Serial.println(razonX, DEC);
}

void loop() {
     nunchuk.update();
   
     // Al multiplicar la posicion del nunckuk por la razon
     // lo convertimos a valores entre cero y 180 para el servo
     posXServo = (int)(nunchuk.accelX - (maxX - minX)) * razonX;
     Serial.print("accelX:");
     Serial.println(nunchuk.accelX, DEC);
   
     Serial.print("posXServo:");
     Serial.println(posXServo, DEC);
     if (posXServo > 180) posXServo=180; //por si por los decimales da un valor superior
     if (posXServo < 0) posXServo=0;
   
     myservo.write(posXServo);
   
     delay(10); //Para dar tiempo a que se coloque el servo


//  nunchuk.update();
//
//  Serial.print(nunchuk.analogX, DEC);
//  Serial.print(' ');
//  Serial.print(nunchuk.analogY, DEC);
//  Serial.print(' ');
//  Serial.print(nunchuk.accelX, DEC);
//  Serial.print(' ');
//  Serial.print(nunchuk.accelY, DEC);
//  Serial.print(' ');
//  Serial.print(nunchuk.accelZ, DEC);
//  Serial.print(' ');
//  Serial.print(nunchuk.zButton, DEC);
//  Serial.print(' ');
//  Serial.println(nunchuk.cButton, DEC);
}


// Calibra todos los acelerometros para saber sus
// valores minimos y maximos
void calibraAccel()  {
 nunchuk.update();
 minX = nunchuk.accelX;
 maxX = nunchuk.accelX;
 minY = nunchuk.accelY;
 maxY = nunchuk.accelY;
 minZ = nunchuk.accelZ;
 maxZ = nunchuk.accelZ;
 contador=0;

 Serial.println("Inicio calibracion");

 while (contador<=200){
     Serial.print("Paso=");
     Serial.println(contador);
     nunchuk.update();
     if (nunchuk.accelX < minX){
       minX=nunchuk.accelX;
     }
     if (nunchuk.accelX > maxX){
       maxX=nunchuk.accelX;
     }
   
     if (nunchuk.accelY < minY){
       minY=nunchuk.accelY;
     }
     if (nunchuk.accelY > maxY){
       maxY=nunchuk.accelY;
     }

     if (nunchuk.accelZ < minZ){
       minX=nunchuk.accelZ;
     }
     if (nunchuk.accelZ > maxZ){
       maxZ=nunchuk.accelZ;
     }   
     delay(10);
     contador++;
 }
 Serial.print("Resultado calibracion X. MinX=");
 Serial.print(minX, DEC);
 Serial.print(" MaxX=");
 Serial.print(maxX, DEC);
 Serial.print(" Diferencia=");
 Serial.println(maxX - minX);

 Serial.print("Resultado calibracion Y. MinY=");
 Serial.print(minY, DEC);
 Serial.print(" MaxY=");
 Serial.print(maxY, DEC);
 Serial.print(" Diferencia=");
 Serial.println(maxY - minY);

 Serial.print("Resultado calibracion Z. MinZ=");
 Serial.print(minZ, DEC);
 Serial.print(" MaxZ=");
 Serial.print(maxZ, DEC);
 Serial.print(" Diferencia=");
 Serial.println(maxZ - minZ);
}

lunes, 19 de diciembre de 2011

Felicitador navideño

Mediante un relé conecto Arduino a una tarjeta de felicitación navideña de las que empiezan a sonar con musiquita navideña y encienden un led.
Uso la cámara de vídeo como sensor de movimiento (no tomo ni grabo la foto) y entonces cierra el relé durante 30 segundos con lo que empieza a sonar el circuito de la tarjeta de felicitación. Pasado ese tiempo lo inactivo durante 5 minutos para que no esté sonando continuamente.


Vídeo primera parte:


Vídeo segunda parte:


Código fuente FelicitadorNavidadV1:

// Mediante un relé conecto Arduino a una tarjeta de felicitación navideña de las que empiezan a sonar
// con musiquita navideña y encienden un led.
// Uso la cámara de vídeo como sensor de movimiento (no tomo ni grabo la foto) y entonces cierra el relé durante 30 segundos con
// lo que empieza a sonar el circuito de la tarjeta de felicitación. Pasado ese tiempo lo inactivo durante
// 5 minutos para que no esté sonando continuamente.

#include <VC0706.h>
#include <SD.h>
#if ARDUINO >= 100
 #include <SoftwareSerial.h>
#else
 #include <NewSoftSerial.h>
#endif

// This is the SD card chip select line, 10 is common
#define chipSelect 10
// This is the camera pin connection. Connect the camera TX
// to pin 2, camera RX to pin 3
#if ARDUINO >= 100
SoftwareSerial cameraconnection = SoftwareSerial(2, 3);
#else
NewSoftSerial cameraconnection = NewSoftSerial(2, 3);
#endif
// pass the serial connection to the camera object
VC0706 cam = VC0706(&cameraconnection);


void setup() {
  Serial.begin(9600);
 
  // Try to locate the camera
  if (cam.begin()) {
    Serial.println("Camera Found:");
  } else {
    Serial.println("No camera found?");
    return;
  }
  // Print out the camera version information
  char *reply = cam.getVersion();
  if (reply == 0) {
    Serial.print("Failed to get version");
  } else {
    Serial.println("-----------------");
    Serial.print(reply);
    Serial.println("-----------------");
  }

  // Set the picture size - you can choose one of 640x480, 320x240 or 160x120
  // Remember that bigger pictures take longer to transmit!
 
  //cam.setImageSize(VC0706_640x480);        // biggest
  cam.setImageSize(VC0706_320x240);        // medium
  //cam.setImageSize(VC0706_160x120);          // small

  // You can read the size back from the camera (optional, but maybe useful?)
  uint8_t imgsize = cam.getImageSize();
  Serial.print("Image size: ");
  if (imgsize == VC0706_640x480) Serial.println("640x480");
  if (imgsize == VC0706_320x240) Serial.println("320x240");
  if (imgsize == VC0706_160x120) Serial.println("160x120");


  //  Motion detection system can alert you when the camera 'sees' motion!
  cam.setMotionDetect(true);           // turn it on
  //cam.setMotionDetect(false);        // turn it off   (default)

  // You can also verify whether motion detection is active!
  Serial.print("Motion detection is ");
  if (cam.getMotionDetect())
    Serial.println("ON");
  else
    Serial.println("OFF");
   
   
    pinMode(6, OUTPUT); // Controla el relay
}


void loop() {
 if (cam.motionDetected()) {
   Serial.println("Motion!");  
   cam.setMotionDetect(false);
   Serial.println("Activamos el relay!");
   digitalWrite(6, HIGH); // Activamos el relay
   delay(30000); // Mantenemos activo 30 seg
   Serial.println("Desctivamos el relay!");
   digitalWrite(6, LOW); // Desactivamos el relay
  
  Serial.println("...Done!");
  delay(300000); // Pausamos 5 min para que no vuelva a activarse demasiado pronto
  cam.resumeVideo();
  cam.setMotionDetect(true);
 }
}

lunes, 28 de noviembre de 2011

Cámara sobre servidor web con envío de tweet y detección de movimiento

El objetivo de este proyecto es utilizar una pequeña cámara que cuando detecta movimiento tome una foto, la almacene en una tarjeta de memoria SD colocada en el ethernet shield, envíe un tweet de aviso y mediante un servidor web (Tiny web server) incorporado en el propio arduino permita que el usuario desde internet se conecte y pueda ver la lista de todas las fotografías almacenadas en la tarjeta y visualizar cualquiera de ellas. También permitirá que el usuario active o desactive las funciones de envío de tweets y la de detección automática de movimiento.
Cuando se detecta moviento antes de hacer la foto se cierra un relé al cual se podría conectar una lámpara de modo que haya luz cuando se haga la foto.


// He tenido que reducir al mínimo las cadenas de texto utilizadas pues estoy en el límite de la memoria del Arduino UNO
// Para que desde el navegador nos podamos descargar un fichero que ya esta en la tarjeta simplemente
// pondremos la ip del sitio seguido de /nombrearchivo Por ejemplo: http://192.168.1.177/IMAGE10.JPG
// Si Unicamente ponemos la ip sin nada detras nos mostrara la lista de los ficheros que contiene la tarjeta
// http://192.168.1.177/1 Activaría la detección de movimiento
// http://192.168.1.177/2 Desactivaría la detección de movimiento
// http://192.168.1.177/3 Activaría el envío de tweets
// http://192.168.1.177/4 Desactivaría el envío de tweets
//
// Version V2: Le pongo activar o desactivar Motion añadiendo en la URL motion_off o motion_on
// Version V3: He quitado muchos if, quito upload file, activar o desactivar motio y lo reduzco todo al mínimo para poder
// mandar el tweet y que quepa en la memoria
// Version V4: Pruebo a almacenar cosas en SRAM en vez de en Flash. Pongo activar o desactivar envio de tweet poniendo
// en la URL tweet_on o tweet_off. Cuando se envia un tweet se pone a off automaticamene. Cada vez que se manda un comando
// se muestra la pagina index con el estado de los switches y la lista de ficheros.
// Version V5: He conectado el rele que permanecerá un intervalo de tiempo encendido desde que se enciende y así poder conectar
// una luz para que la cámara pueda sacar una foto nítida
// IMPORTANTE: He intentado poner todo el proyecto sobre Arduino Mega 2560 para terminar con los problemas de memoria
// pero no ha sido posible porque la versión 10 de
// la librería NewSoftSerial no funciona sobre Mega. He probado con la beta 11 de
// http://arduiniana.org/2011/01/newsoftserial-11-beta pero no he conseguido que funcione
// TODO: crear una cuenta de twitter especifica y habilitarla para envio de sms
// TODO: abrir puertos del PC para ver el Arduino
// TODO: posibilidad de borrar las fotografías.
// TODO: añadir opción para que pueda dispararse de manera remota una foto aunque no se haya detectado movimiento
// TODO: poner la cámara sobre unos servos de modo que puediera moverse su orientación de manera remota

//
// Cuando graba 99 fotos la nueva siempre se graba como 99, una y otra vez. Decido dejarlo así.
//
// Sobre Tiny Web Server http://www.webweavertech.com/ovidiu/weblog/archives/000484.html
// Para el envío de tweets, como es muy costoso en términos de memoria se utiliza una aplicación externa http://arduino-tweet.appspot.com
// Ethernet shield http://www.adafruit.com/products/201


Ejemplo de la pantalla con el índice de todas las fotos:


Código fuente CamaraTinyWebServerV5:

// -*- c++ -*-
// Author: Antonio García Figueras
// Date: Noviembre 2011
// Programa para controlar una microcámara que al detectar moviento active un relé, al que se puede conectar una bombilla,
// tome una foto y la guarde en la tarjeta de memoria SD que se colocaría en el ethernet shield. Seguidamente se enviaría un tweet.
// Foto con los circuitos necesarios en
// http://xp-dev.com/svn/arduino_antonio/trunk/C%C3%A1mara/Foto%20conexi%C3%B3n%20c%C3%A1mara%20a%20shiel%20ethernet%20y%20relay.jpg
// Este ethernet shield permitirá
// que el servidor web (Tiny web server) que he usado permita visualizar la lista de fotografías que se hayan ido almacenando en la tarjeta
// de memoria y que el usuario desde internet pueda visualizar cualquiera de ellas. También puede activar o desactiva la
// función de detectar movimiento de la cámara y el envío o no de tweets.
// He tenido que reducir al mínimo las cadenas de texto utilizadas pues estoy en el límite de la memoria del Arduino UNO
// Para que desde el navegador nos podamos descargar un fichero que ya esta en la tarjeta simplemente
// pondremos la ip del sitio seguido de /nombrearchivo Por ejemplo: http://192.168.1.177/IMAGE10.JPG
// Si Unicamente ponemos la ip sin nada detras nos mostrara la lista de los ficheros que contiene la tarjeta
// http://192.168.1.177/1 Activaría la detección de movimiento
// http://192.168.1.177/2 Desactivaría la detección de movimiento
// http://192.168.1.177/3 Activaría el envío de tweets
// http://192.168.1.177/4 Desactivaría el envío de tweets
//
// Version V2: Le pongo activar o desactivar Motion añadiendo en la URL motion_off o motion_on
// Version V3: He quitado muchos if, quito upload file, activar o desactivar motio y lo reduzco todo al mínimo para poder
// mandar el tweet y que quepa en la memoria
// Version V4: Pruebo a almacenar cosas en SRAM en vez de en Flash. Pongo activar o desactivar envio de tweet poniendo
// en la URL tweet_on o tweet_off. Cuando se envia un tweet se pone a off automaticamene. Cada vez que se manda un comando
// se muestra la pagina index con el estado de los switches y la lista de ficheros.
// Version V5: He conectado el rele que permanecerá un intervalo de tiempo encendido desde que se enciende y así poder conectar
// una luz para que la cámara pueda sacar una foto nítida
// IMPORTANTE: He intentado poner todo el proyecto sobre Arduino Mega 2560 para terminar con los problemas de memoria
// pero no ha sido posible porque la versión 10 de
// la librería NewSoftSerial no funciona sobre Mega. He probado con la beta 11 de
// http://arduiniana.org/2011/01/newsoftserial-11-beta pero no he conseguido que funcione
// TODO: crear una cuenta de twitter especifica y habilitarla para envio de sms
// TODO: abrir puertos del PC para ver el Arduino
// TODO: posibilidad de borrar las fotografías.
// TODO: añadir opción para que pueda dispararse de manera remota una foto aunque no se haya detectado movimiento
// TODO: poner la cámara sobre unos servos de modo que puediera moverse su orientación de manera remota

//
// Cuando graba 99 fotos la nueva siempre se graba como 99, una y otra vez. Decido dejarlo así.
//
// Sobre Tiny Web Server http://www.webweavertech.com/ovidiu/weblog/archives/000484.html
// Para el envío de tweets, como es muy costoso en términos de memoria se utiliza una aplicación externa http://arduino-tweet.appspot.com
// Ethernet shield http://www.adafruit.com/products/201

// Para el Tiny Web Server
#include <SPI.h>
#include <Ethernet.h>
#include <Flash.h>
#include <SdFat.h>
#include <SdFatUtil.h>
#include <TinyWebServer.h>

// Para la camara
#include <VC0706.h>
#include <NewSoftSerial.h>

// Para Tweeter
#include <EthernetDNS.h>
#include <Twitter.h>

boolean file_handler(TinyWebServer& web_server);
boolean index_handler(TinyWebServer& web_server);

boolean tweetOn=false;

boolean isRelayOn=false;

long previousMillis = 0;
//Intervalo en milisegundos que permanecerá el relé encendido
long interval = 10000;


// change this to match your SD shield or module;
// Arduino Ethernet shield: pin 4
// Adafruit SD shields and modules: pin 10
// Sparkfun SD shield: pin 8
#define chipSelect 4
// This is the camera pin connection. Connect the camera TX
// to pin 2, camera RX to pin 3
NewSoftSerial cameraconnection = NewSoftSerial(2, 3);
// pass the serial connection to the camera object
VC0706 cam = VC0706(&cameraconnection);

TinyWebServer::PathHandler handlers[] = {
  // Work around Arduino's IDE preprocessor bug in handling /* inside
  // strings.
  //
  // `put_handler' is defined in TinyWebServer
   {"/1", TinyWebServer::GET, &motionOn_handler },
  {"/2", TinyWebServer::GET, &motionOff_handler },
  {"/3", TinyWebServer::GET, &tweetOn_handler },
  {"/4", TinyWebServer::GET, &tweetOff_handler },
  {"/", TinyWebServer::GET, &index_handler },
//  {"/upload/" "*", TinyWebServer::PUT, &TinyWebPutHandler::put_handler },
  {"/" "*", TinyWebServer::GET, &file_handler },
  {NULL},
};

const char* headers[] = {
//  "Content-Length",
//  NULL
};

TinyWebServer web = TinyWebServer(handlers, headers);

//boolean has_filesystem = true;
Sd2Card card;
SdVolume volume;
SdFile root;
SdFile file;

static uint8_t mac[] = { 0xDE, 0xAD, 0xBE, 0xEF, 0xFE, 0xED };

// Don't forget to modify the IP to an available one on your home network
byte ip[] = { 192, 168, 1, 177 };

// Your Token to Tweet (get it from http://arduino-tweet.appspot.com/)
Twitter twitter("353548191-qy3gHOQDgwxiKVW8bsRihE4rRTllZIkC4CFEdGDD");

void send_file_name(TinyWebServer& web_server, const char* filename) {
  if (!filename) {
    web_server.send_error_code(404);
//    web_server << F("Could not parse URL");
  } else {
    TinyWebServer::MimeType mime_type
      = TinyWebServer::get_mime_type_from_filename(filename);
    web_server.send_error_code(200);
    web_server.send_content_type(mime_type);
    web_server.end_headers();
    if (file.open(&root, filename, O_READ)) {
//      Serial << F("Read file "); Serial.println(filename);
      web_server.send_file(file);
      file.close();
    } else {
//      web_server << F("Could not find file: ") << filename << "\n";
    }
  }
}

boolean file_handler(TinyWebServer& web_server) {
  char* filename = TinyWebServer::get_file_from_path(web_server.get_path());
  send_file_name(web_server, filename);
  free(filename);
  return true;
}


boolean tweetOn_handler(TinyWebServer& web_server){
  tweetOn=true;
  generaIndex(web_server);
  return true;
}

boolean tweetOff_handler(TinyWebServer& web_server){
  tweetOn=false;
  generaIndex(web_server); 
  return true;
}

boolean motionOff_handler(TinyWebServer& web_server) {
//  Serial.println("Recibida peticion de motion OFF");
  cam.setMotionDetect(false);
  generaIndex(web_server); 
  return true;
}
//
boolean motionOn_handler(TinyWebServer& web_server) {
//  Serial.println("Recibida peticion de motion ON");
  cam.setMotionDetect(true);
  generaIndex(web_server); 
  return true;
}

boolean index_handler(TinyWebServer& web_server) {
//  send_file_name(web_server, "INDEX.HTM");
//  web_server.send_error_code(200);
//  web_server.end_headers();
////  web_server << F("<html><body><h1>Hola. La tarjeta contiene los siguientes ficheros:</h1></body></html>\n");
//  web_server << "<html><body>motion:";
//  if (cam.getMotionDetect())
//    web_server << "ON";
//  else
//    web_server << "OFF";
//   
//  web_server << "<br>tweet:";
//    if (tweetOn)
//    web_server << "ON";
//  else
//    web_server << "OFF";
//   
//  ListFiles(web_server, LS_SIZE);
//  web_server << "</body></html>\n"; 

  generaIndex(web_server);
  return true;
}

void generaIndex(TinyWebServer& web_server){
  web_server.send_error_code(200);
  web_server.end_headers();
//  web_server << F("<html><body><h1>Hola. La tarjeta contiene los siguientes ficheros:</h1></body></html>\n");
  web_server << "<html><body>mot:";
  if (cam.getMotionDetect())
    web_server << "ON";
  else
    web_server << "OFF";
   
  web_server << "<br>tw:";
    if (tweetOn)
    web_server << "ON";
  else
    web_server << "OFF";
   
  ListFiles(web_server, LS_SIZE);
  web_server << "</body></html>";  
}

void ListFiles(TinyWebServer& web_server, uint8_t flags) {
  // This code is just copied from SdFile.cpp in the SDFat library
  // and tweaked to print to the client output in html!
  dir_t p;
 
  root.rewind();
  web_server << "<ul>";
  while (root.readDir(p) > 0) {
    // done if past last used entry
    if (p.name[0] == DIR_NAME_FREE) break;

    // skip deleted entry and entries for . and ..
    if (p.name[0] == DIR_NAME_DELETED || p.name[0] == '.') continue;

    // only list subdirectories and files
    if (!DIR_IS_FILE_OR_SUBDIR(&p)) continue;


    // print any indent spaces
    web_server << "<li><a href=\"";
    for (uint8_t i = 0; i < 11; i++) {
      if (p.name[i] == ' ') continue;
      if (i == 8) {
        web_server << ".";
      }
      web_server << p.name[i];
    }
    web_server << "\">";
   
    // print file name with possible blank fill
    for (uint8_t i = 0; i < 11; i++) {
      if (p.name[i] == ' ') continue;
      if (i == 8) {
        web_server << ".";
      }
      web_server << p.name[i];
    }
   
    web_server << "</a>";
   
    if (DIR_IS_SUBDIR(&p)) {
      web_server << "/";
    }

    // print modify date/time if requested
    if (flags & LS_DATE) {
       root.printFatDate(p.lastWriteDate);
       web_server << " ";
       root.printFatTime(p.lastWriteTime);
    }
    // print size if requested
    if (!DIR_IS_SUBDIR(&p) && (flags & LS_SIZE)) {
      web_server << " ";
      web_server << p.fileSize;
    }
    web_server << "</li>";
  }
  web_server << "</ul>";
}

//void file_uploader_handler(TinyWebServer& web_server,
//               TinyWebPutHandler::PutAction action,
//               char* buffer, int size) {
//  static uint32_t start_time;
//  static uint32_t total_size;
//
//  switch (action) {
//  case TinyWebPutHandler::START:
//    start_time = millis();
//    total_size = 0;
//    if (!file.isOpen()) {
//      // File is not opened, create it. First obtain the desired name
//      // from the request path.
//      char* fname = web_server.get_file_from_path(web_server.get_path());
//      if (fname) {
////    Serial << F("Creating ") << fname << "\n";
//    file.open(&root, fname, O_CREAT | O_WRITE | O_TRUNC);
//    free(fname);
//      }
//    }
//    break;
//
//  case TinyWebPutHandler::WRITE:
//    if (file.isOpen()) {
//      file.write(buffer, size);
//      total_size += size;
//    }
//    break;
//
//  case TinyWebPutHandler::END:
//    file.sync();
////    Serial << F("Wrote ") << file.fileSize() << F(" bytes in ")
////       << millis() - start_time << F(" millis (received ")
////           << total_size << F(" bytes)\n");
//    file.close();
//  }
//}

void inicializaCamara(){
//  Serial.println("VC0706 Camera test");
   
  // Try to locate the camera
  cam.begin();
//  if (cam.begin()) {
////    Serial.println("Camera Found:");
//  } else {
////    Serial.println("No camera found?");
//    return;
//  }
  // Print out the camera version information (Realmente no es optional)
  char *reply = cam.getVersion();
//  if (reply == 0) {
////    Serial.print("Failed to get version");
//  } else {
////    Serial.println("-----------------");
////    Serial.print(reply);
////    Serial.println("-----------------");
//  }

  // Set the picture size - you can choose one of 640x480, 320x240 or 160x120
  // Remember that bigger pictures take longer to transmit!
 
//  cam.setImageSize(VC0706_640x480);        // biggest
//  cam.setImageSize(VC0706_320x240);        // medium
  cam.setImageSize(VC0706_160x120);          // small

  // You can read the size back from the camera (optional, but maybe useful?)
//  uint8_t imgsize = cam.getImageSize();
//  Serial.print("Image size: ");
//  if (imgsize == VC0706_640x480) Serial.println("640x480");
//  if (imgsize == VC0706_320x240) Serial.println("320x240");
//  if (imgsize == VC0706_160x120) Serial.println("160x120");


  //  Motion detection system can alert you when the camera 'sees' motion!
  cam.setMotionDetect(true);           // turn it on
  //cam.setMotionDetect(false);        // turn it off   (default)

  // You can also verify whether motion detection is active!
//  Serial.print("Motion detection is ");
//  if (cam.getMotionDetect())
////    Serial.println("ON");
//  else
//    Serial.println("OFF");
}

void tomaFoto(){
//   Serial.println("Motion!");  
   cam.setMotionDetect(false);
  
   cam.takePicture();
//  if (! cam.takePicture())
////    Serial.println("Failed to snap!");
//  else
//    Serial.println("Picture taken!");
 
  char filename[13];
  strcpy(filename, "IMAGE00.JPG");
  
  for (int i = 0; i < 100; i++) {
    filename[5] = '0' + i/10;
    filename[6] = '0' + i%10;
    // create if does not exist, do not open existing, write, sync after write
    if (! root.exists(filename)) {
      break;
    }
  }
 
  SdFile imgFile;
  imgFile.open(&root, filename, O_CREAT | O_WRITE | O_TRUNC);
 
  uint16_t jpglen = cam.frameLength();
//  Serial.print(jpglen, DEC);
//  Serial.println(" byte image");
//
//  Serial.print("Writing image to "); Serial.print(filename);
 
  while (jpglen != 0) {
    // read 64 bytes at a time;
    // cambio a 32 bytes el buffer para que funciones
    uint8_t *buffer;
    uint8_t bytesToRead = min(32, jpglen);
    buffer = cam.readPicture(bytesToRead);
    imgFile.write(buffer, bytesToRead);

    //Serial.print("Read ");  Serial.print(bytesToRead, DEC); Serial.println(" bytes");

    jpglen -= bytesToRead;
  }
  imgFile.close();
//  Serial.println("...Done!");
  cam.resumeVideo();
  cam.setMotionDetect(true);
}

void enviaTweet(){
  if (twitter.post("B")){
    twitter.wait();
  }
}

void relayOn(){
    digitalWrite(6, HIGH);
    isRelayOn=true;
    previousMillis = millis();
}

void relayOff(){
    digitalWrite(6, LOW);
    isRelayOn=false;   
}
 

void setup() {
//  Serial.begin(9600);
//  Serial << F("Free RAM: ") << FreeRam() << "\n";

  // initialize the SD card
//  Serial << F("Setting up SD card...\n");
  pinMode(10, OUTPUT); // set the SS pin as an output (necessary!)
  digitalWrite(10, HIGH); // but turn off the W5100 chip!
  card.init(SPI_FULL_SPEED, 4);
//  if (!card.init(SPI_FULL_SPEED, 4)) {
////    Serial << F("card failed\n");
//    has_filesystem = false;
//  }
  // initialize a FAT volume
  volume.init(&card);
//  if (!volume.init(&card)) {
////    Serial << F("vol.init failed!\n");
//    has_filesystem = false;
//  }

  root.openRoot(&volume);
//  if (!root.openRoot(&volume)) {
////    Serial << F("openRoot failed");
//    has_filesystem = false;
//  }

//  if (has_filesystem) {
//    // Assign our function to `upload_handler_fn'.
//    TinyWebPutHandler::put_handler_fn = file_uploader_handler;
//  }

//  Serial << F("Setting up the Ethernet card...\n");
  Ethernet.begin(mac, ip);

  // Start the web server.
//  Serial << F("Web server starting...\n");
  web.begin();

//  Serial << F("Ready to accept HTTP requests.\n");
 
  inicializaCamara();
    pinMode(6, OUTPUT);
}

void loop() {

//  if (has_filesystem) {
    web.process();
//  }
 
  if (cam.motionDetected()) {
    tomaFoto();
    relayOn();
    if (tweetOn){
      enviaTweet();
      // En cuanto envio un tweet desactivo el envío
      tweetOn=false;
    }
  }
 
  if(isRelayOn && (millis()-previousMillis > interval)) {
    //Apagamos el relay si ya se ha sobrepasado encedido el intervalo estipulado
    relayOff();
  }
}


lunes, 5 de septiembre de 2011

ArduWallyTruck: camión de radiocontrol controlado con Arduino

Este es mi primer proyecto realizado con Arduino.

El reto que me planteé era controlar un camión de radio control colocándole un sensor de distancia infrarrojo, situado sobre un servo de modo que cuando detecta un obstáculo hace girar al sensor de modo que pueda descubrir si hay algún obstáculo que le impida girar.


Para controlar el camión he utilizado los controles de marcha y giro del emisor de radiocontrol (que he colocado sobre el propio camión) manejándolos mediante cada uno de los cuatro MOSFET, símplemente para abrir o cerar cada uno de los cuatro interruptores.
Tanto el sensor de infrarrojos como el servo sobre el que se apoya van directamente a la placa de Arduino.
Debido a la velocidad que desarrolla el camión unido al poco ángulo de giro de sus ruedas me ha obligado a frenar cuando se detecta un obstáculo al frente y entonces, tras detectar si hay espacio para torcer retroceder girando. Inicialmente para frenar únicamente cortaba la alimentación del motor, pero debido a la inercia conseguía unos estupendos choques. Así pues para frenar pongo la marcha atrás el tiempo necesario para paralo. Otro problema fue el servo utilizado para conseguir el giro del sensor. En las pruebas realizadas alimentando la placa mediante USB funcionaba perfectamente, pero cuando lo alimentaba mediante la batería fallaba. Para solucionarlo cambié el servo por otro más pequeño, con menos consumo de energía.

Componentes utilizados:

  • El camión de radiocontrol comprado en una tienda de chinos por 9,90€ (yo lo compré en la tienda, no en la web que enlazo).
  • Arduino UNO
  • 4 MOSFET modelo IRF3710 para utilizarlos como interruptores de las señales de avance y retroceso del motor y de giro a derecha o izquierda. Aprendí a utilizarlos gracias al proyecto Landruino
  • Una caja para la batería de 9v.
    .
  • 1 sensor de distancia infrarrojo
  • Una placa para prototipos
  • Un servo para hacer girar el sensor. Usé este microservo porque cuando utilicé otro mayor no funcionaba adecuadamente que debido a la batería, porque cuando lo alimentaba con la salida usb iba perfectamente.

Diagrama (¡mi primer diagrama con Fritzing!):


Programa:

 #include <Servo.h>
 
 const int distanciaLimiteFrontal=180; // Valor mas alto cuanto más cerca
 const int distanciaLimiteLateral=450;
 const int pinAdelante = 9;    // connected to the base of the transistor
 const int pinAtras = 10;
 const int pinDerecha = 11;
 const int pinIzquierda = 12;
 const int retardoServo = 1000;
 const int tiempoGiro = 1100;
 const int tiempoFreno = 600;

 int sensorValue;
 Servo myservo; 
 int grados;

 //Permite saber hacia donde se giró la vez anterior
 //para intentar girar de nuevo hacia ahí
 int gradosGiroAnterior=0;

 void setup() {
  // initialize serial communications at 9600 bps:
  Serial.begin(9600);

   // preparo el led como salida
   pinMode(13, OUTPUT);
   // set  the transistor pin as output:
   pinMode(pinAdelante, OUTPUT);
   pinMode(pinAtras, OUTPUT);
   pinMode(pinDerecha, OUTPUT);
   pinMode(pinIzquierda, OUTPUT);
  
   myservo.attach(8);  // attaches the servo on pin 8 to the servo object
   myservo.write(90); // Lo inicializamos en el centro
   delay(retardoServo);

 }

 void loop() {
   //Siempre comenzamos iteracción con el servo al frente
   centraServo();
   sensorValue = analogRead(A2);
   Serial.print("En loop sensorValue=");
   Serial.println(sensorValue, DEC);  
   //Detectamos si hay algún obstáculo al frente
   if (sensorValue < distanciaLimiteFrontal){
     avanza();
   }else{  
     paraConRetroceso(); //Paramos mientras se decide hacia donde girar
     Serial.print("Se ha rebasado la distancia limite. La distancia para colision es ");
     Serial.println(sensorValue, DEC); 
    
     grados=gradosDireccionASeguir();
     if (grados == 0){
       giroConRetroceso(pinIzquierda);
     }else if (grados == 180){
       giroConRetroceso(pinDerecha);
     }else{
       Serial.println("No se puede girar.");
     }   
   }
 }


 void avanza(){
   Serial.println("Avanza");
   digitalWrite(pinAdelante, HIGH);
   Serial.println("Damos potencia al motor");
 }

 void centraServo(){
   if (myservo.read()!=90){
     Serial.println("Se coloca a 90 grados");
     myservo.write(90); //Colocamos el servo orientado al frente
     delay(retardoServo); //Le damos tiempo a colocarse
   }  
 }

 void para(){
   Serial.println("Para");
   digitalWrite(pinAdelante, LOW);
   digitalWrite(pinAtras, LOW);
 }

 // Para evitar que avance por la inercia
  void paraConRetroceso(){
   Serial.println("Para");
   digitalWrite(pinAdelante, LOW);
   digitalWrite(pinAtras, HIGH);
   delay(tiempoFreno);
   digitalWrite(pinAtras, LOW);
 }


  void giroConRetroceso(int pinSentido){
    Serial.print("Giro con retroceso. pinSentido: ");
    Serial.println(pinSentido, DEC);
    digitalWrite(pinAdelante, LOW); //Paro la marcha adelante
    digitalWrite(pinSentido, HIGH);
    digitalWrite(pinAtras, HIGH);
    delay(tiempoGiro);
    digitalWrite(pinAtras, LOW);
    digitalWrite(pinSentido, LOW);
 }


 int distanciaObstaculo(int grados){
     myservo.write(grados);
     delay(retardoServo);
     int distancia = analogRead(A2);
     Serial.print("Distancia a ");
     Serial.print(grados, DEC);
     Serial.print("grados es ");
     Serial.println(distancia, DEC); 
     return distancia;
 }


 //Devuelve los grados 0 ó 180 cuya dirección está más despejada de obstáculos
 int gradosDireccionASeguir(){
   int distancia0Grados = distanciaObstaculo(0);
   int distancia180Grados = distanciaObstaculo(180);
   if (distancia0Grados > distanciaLimiteLateral && distancia180Grados > distanciaLimiteLateral){
     Serial.println("Grados direccion a seguir=999");
     return 999; //No se puede ir ni a derecha ni a izquierda
   }
   if (distancia0Grados < distanciaLimiteLateral && distancia180Grados > distanciaLimiteLateral){
     Serial.println("Grados direccion a seguir=0");
     gradosGiroAnterior=0;
     return 0; //A cero grados está más despejado
   }
   if (distancia0Grados < distanciaLimiteLateral && distancia180Grados > distanciaLimiteLateral){
     Serial.println("Grados direccion a seguir=0");
     gradosGiroAnterior=0;
     return 0; //A cero grados está más despejado
   }
   if (distancia0Grados > distanciaLimiteLateral && distancia180Grados < distanciaLimiteLateral){
     Serial.println("Grados direccion a seguir=180");
     gradosGiroAnterior=180;
     return 180; //A 180 grados está más despejado
   }
   if (distancia0Grados < distanciaLimiteLateral && distancia180Grados < distanciaLimiteLateral){
     //Podríamos a derecha o izquierda y lo decidimos en función del giro anterior
     if (gradosGiroAnterior == 0){
       Serial.println("Grados direccion a seguir=0");
       gradosGiroAnterior=0;
       return 0;
     }else{
       Serial.println("Grados direccion a seguir=180");
       gradosGiroAnterior=180;
       return 180; //A 180 grados está más despejado 
     }    
   }
 }